In my last post I mentioned I was going to show you how to make Letter Pendants. These are great for baby showers, wedding showers, BFF necklaces/bracelets/earrings, and wedding centerpieces.
Let's get started!
WARNING: This project takes quite a bit of time! 3+ hours. So if you have a weekend to yourself, try this out! Also, once you get the hang of the process it will become less messy as you go. Good luck and have fun!
Materials: Wax Parchment Paper, Tacky Glue, Mod Podge Dimensional Glue, Super Glue, Nail Filers, Metal Filers, Small Paint Brushes (2), Scissors, Card Stock, Small Metal Rings, Mod Podge Sealing Glue (aka Puzzle Saver).
- I thought the idea of Scrabble letters was cute, but with the numbers in the corner, I didn't find it to be as personable as they could be. I was glad to find these letters at Michael's and even happier to know they saved me the time energy with the pre-punched holes! These letters come in a pack of 100+ and super cheap!
- I have three different sized jumpers but tend to lean toward using the medium and large size to create a rustic look. Also, bright silver polished jumpers look too bright and clean cut for me. Keep it old fashioned with darker polished jumpers!
- Find card stock that speaks to you but also for your guests. I used scrap booking paper because of the vastness of texture, colors and patterns. Personally, I would love to stick with only black and white patterns, but not everyone else likes that.
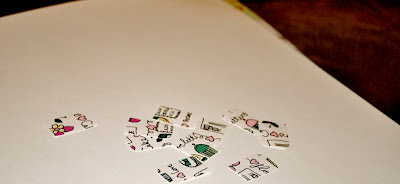
- You can either trace each wooden letter onto the piece of paper and individually cut out each traced piece. Or you can paste the wooden letters on the card stock and cut around each letter.
- I paste the letters directly onto the back of the card stock, (make sure the paper is faced down and the plain side of the wooden piece is being glued directly onto the paper).
- Take the Tacky Glue and dispense a small drop onto the back of the plain side of the wood. Using a paint brush, paint the glue evenly, paying close attention to get the edges and corners.
- Place wooden piece on card stock. Glue dries fast... Cut very close around each letter.
- Now its time to lay down the wax paper!
- DO NOT shake the dimensional glue! (Will cause unwanted bubbles).
- Start from outside in. I focused on making the letters pop, but it's up to you what side you want 'laminated'. Starting from outside in, make sure to cover the whole surface. If your handy enough, you won't have to worry too much about the drilled hole being filled. You'll see once you do it yourself!
- If you do have bubbles, (which will happen), simply use your finger nail and lightly scrape it off. Using a pin does NOT work. Don't waste your time.
- If you screw up, don't worry! This glue is water based and can be cleaned easily with cold water and soap.
- Once having applied the dimensional glue, let letters sit for at LEAST 3 hours to dry, or else... you may run into letters sticking together if you decide to clean up your project for the day.
- Once the letters have dried for at least 3 hours, take another paint brush and paint a small dab of the sealing glue on the paper backing and spread evenly making sure to cover the sides of the wooden letters!
All together this project took me about 2 days to do. A few extra trips to the craft store for extra supplies and waiting to dry took the majority of the time...
And there you have it! I added little rhinestones to the lower right corner of some letters making it fun for my guests to choose which letter they like most!
If you're thinking of doing something like this for small wedding details, make sure you have the time and energy! Since it's an inexpensive craft, hiring someone else to make these for you on your special day may be a better choice! For every 100 guests, charge no more than $150... heads up! :)


